Dixie

Better Media Management

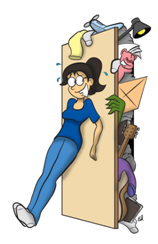
Junk ClosetWordPress makes it very easy to add media (photos, PDFs, Word docs, etc.) to your site with the Add Media button.

Like many cloud storage programs, WordPress stores the media files in a separate area from the content.  This can create an “out of site, out of mind” pile of files in the Media Library.

The older your site grows, the bigger the Media Library. If you keep adding media, eventually it will grow into a junk closet situation where you dread the cleanup process, and may even upload additional copies of files to avoid digging through the big pile of existing files.

The following tips will help prevent the problem and to make the cleanup less painful.


  • Upload a media file once and reuse it in multiple pages and posts.  This saves  a ton of space and clutter in the Media Library.
  • When you need to delete a media file, start in the Media Library and look at the places the file has been inserted (see instructions below on Media File cleanup).  Once you know the location of the inserted files, then delete the original from the Media Library, and edit each page and post to remove the inserted files.
  • If you need to update a media file, use the instructions above re deleting files.
  • Give meaningful names to media files before you upload them to WordPress.  Consider what would be a meaningful name when you review the Media Library six months or a year from now.  Do not include spaces or punctuation (except underscores or dashes) in the filename.  Once you’ve uploaded the file to the Media Library, you can add a description that visitors won’t see.
  • Downsize the file BEFORE you upload it to WordPress.  The file resolution should not be greater than 72ppi, and the width should be about 300px maximum.  Banner images are the exception.  The site http://webresizer.com/ lets you downsize the files without additional software like Adobe Photoshop.


  • One media file can appear in several places, but deleting one does not remove all the copies.  You have to find all the copies and delete them individually.
  • Understand that the media file original is always stored in the Media Library – not inside the page or post like Microsoft Word.  Deleting the link to the media file, or the photo, from inside a page or post does NOT remove the copy from the Media Library, or from other pages or posts.  To delete the media file, you must delete it from the page or post and from the Media Library.  The Media Library can show you the names of the other pages and posts which use the file, to help avoid broken links.
  • Outdated and duplicate copies of media files can turn up in searches within your site, and also visitors coming from the search engines (Google, Bing, Yahoo, etc.).  This means people can stumble across outdated or incorrect information out of context and not realize the information isn’t cu
  • Before uploading a media file, check the Media Library to see if it already exists on the site.

How to Fix Common Webpage Editing Problems

WordPress empowered small business owners.  It allowed them to update their website content without having to rely on a web designer  or having to learn HTML.  This ease of editing helped drive the explosion of blogs.

Website owners and bloggers dove into the WordPress editor and started producing content.  The editor buttons looked very familiar–and for good reason. The WordPress editor buttons look very similar to the ones Microsoft uses in Microsoft Word.

WordPress Editor Buttons: (WordPress is used for blogs and websites)

WordPressSimpleToolbar

Microsoft Word 2007 Editing Buttons: (Word is used for print documents)
Word2007Buttons

However, even though the editing buttons look similar, formatting on the Web works differently than in Word.

In Word, formatting is precise, and you may have heard the term “What You See is What You Get” – WYSIWYG.

On the Web, that concept goes out the window.

Word’s strengths include:

  1. the ability to space text with hanging indents, tabs, and columns
  2. easily mixing formatting in the same paragraph, and even in the same line
  3. heavy control of spacing between lines and paragraphs

By comparison, formatting through a web editor is far less sophisticated:

  1. Tabs and hanging indents don’t exist, and columns are flakey
  2. Mixing formatting can be done, but too much of it can result in a mess
  3. All control of spacing on the Web is relative and can change browser to browser and device to device

If you want to take text from a complex print piece and bring it to a webpage, plan to spend extra time formatting and proofing the page, and check the final page in multiple browsers.

Here are some common problems along with ways to fix them:

Pasting Text from Word:

Text with simple formatting may paste well into Word.  Text with more complex formatting (e.g. some bold, some italics in the same paragraph) may wind up garbled.  If the pasted text looks odd, you have two options:

1) Select the pasted text and click the Clear Formatting button on the WordPress toolbar:

ClearFormattingButton

This strips out the leftover styles from Word.  Reapply formatting using the buttons on the WordPress formatting toolbar.

2) Delete the pasted text, and paste it again with the Paste as text button in WordPress:

Save_as_Text

Reapply formatting using the buttons on the WordPress formatting toolbar.

Unwanted Changes in Formatting – Mid-word, Mid-Sentence, Mid-Paragraph

HTML, the language of the webpage, works with pairs of tags. For example, when you select text and click the Bold button, the editor writes this HTML, which the web browser (Internet Explorer, Firefox, etc.) reads to draw the page:

BoldWebTags

Let’s say you also select the same text, and add italics:

BoldandItalicsFormattingTags

With each successive command, the editor tries to nest another set of tags around the selected text. Unfortunately sometimes the editor hiccups an doesn’t write an end tag correctly. The end tag stops a formatting command. So when formatting “runs on” or changes unexpectedly, a misplaced or garbled tag is often at fault. To correct the text, select the text all the way to the end of the paragraph and reapply the formatting. For example, if the bold is wrong mid-paragraph, select the whole paragraph and hit bold until it turns the bold off. This should fix the tags. Then go back and select just the text you want bold and hit bold again.

Paragraph Spacing

Whether you are using Word or the WordPress editor, there are two types of spacing: a line break, which brings the next line tight against the last, and paragraph spacing, which leaves “breathing space” between the paragraphs. In WordPress, press Enter to create a new paragraph, or Shift and Enter to create a line break.

Make sure to check your the results of your edits in as many web browsers as you can.  Paragraph spacing in the final page may vary by web browser.  That is one of the quirks of the Web.

Important Note:

Most WordPress themes globally set text size; if you find yourself changing text size and other attributes paragraph after paragraph and page after page to get a different look, you may want to talk with a web designer to have them make a global change to the theme. Otherwise you can wind up with a ton of extra HTML tags and eventually break the page.

Untangling a Gordian Knot

Sometimes a heavily-edited page turns into a tangled mess of nested HTML tags.  Untangling the tags can be a real headache for someone not comfortable with hand-editing HTML.  At that point, you may want to call in a web designer who can edit the tags down to the bare minimum so the page will be easier to edit in the future.

My Favorite Movie Opening

Still a classic: